
Software Update - 576 v. 6.250
Released 2012-03-16
Software Description
Recap of the changes made in software versions 6.250, 6.300, and 6.310:
- On NMEA output the baud rate has been locked in at 4800
- Bug fixes to enhance importing a large number of waypoints from an SD/MMC card.
- For Side Imaging units, Auto Ranging has been fixed.
- Improved sonar performance in shallow water
- In addition, several User Interface Enhancements were added.
- Menu Arrow update - Previously when there were no further options the arrow would change to a lighter color. Now there is no arrow shown when there are no further options available.
- Style selection for Course Projection Lines - this allows you to select either an arrow, line or line with tick marks. (Only on Chart plotter products, not Track plotters)
- STANDARD:
- SINGLE VECTOR:
- COURSE OVER GROUND / SPEED OVER GROUND:
- STANDARD:
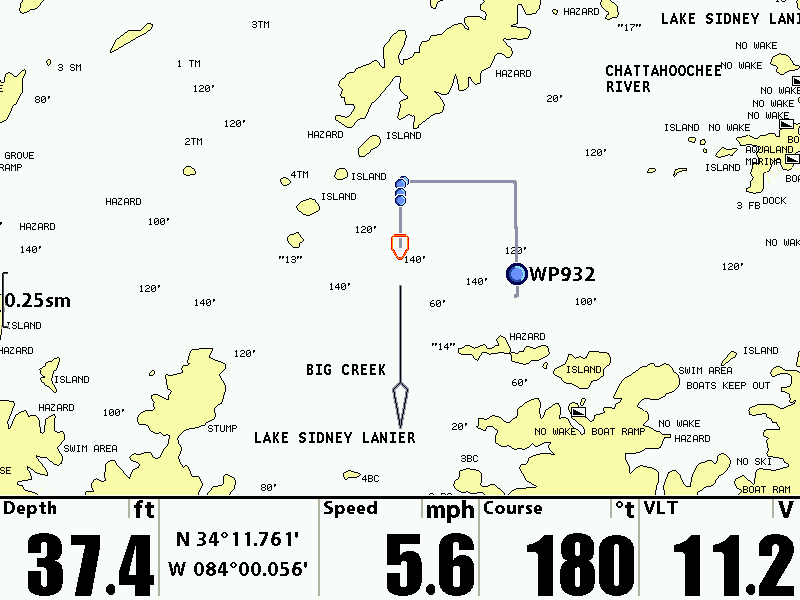
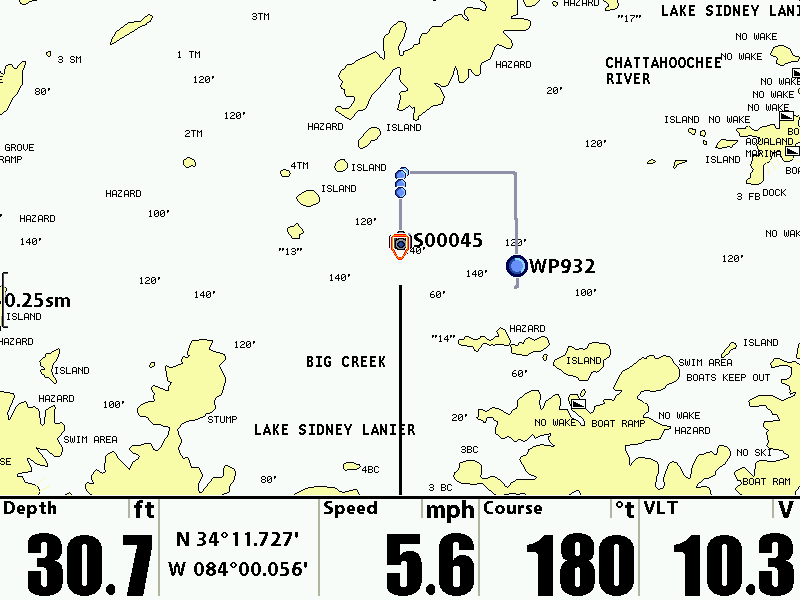
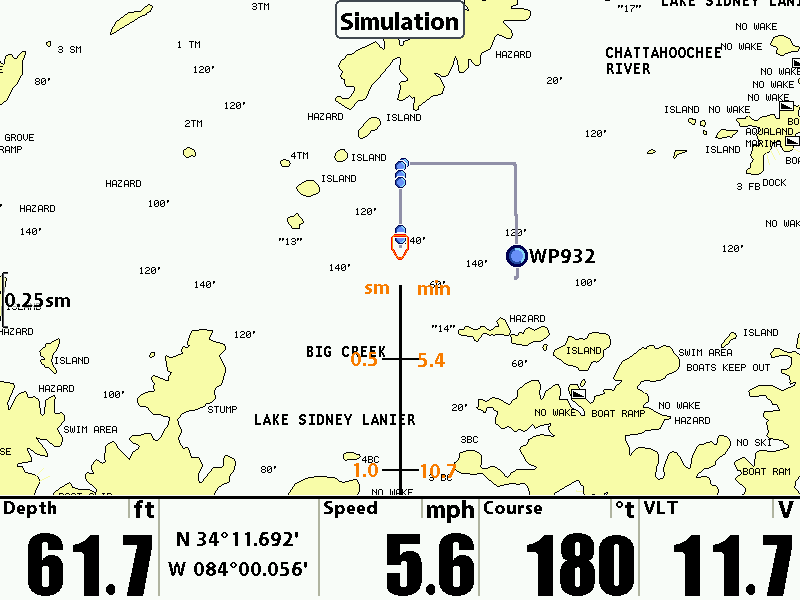
- Waypoint Proximity Flags - allows you to display or hide waypoint flags for the ten closest waypoints to the boat or active cursor. The flags show the distance from the boat to each waypoint. These flags are influenced by the zoom level and boat speed. They are only displayed if the chart range is less than .5 sm and the boat is traveling less than 15 mph.
Can be set to Hidden or Visible. The default is Hidden.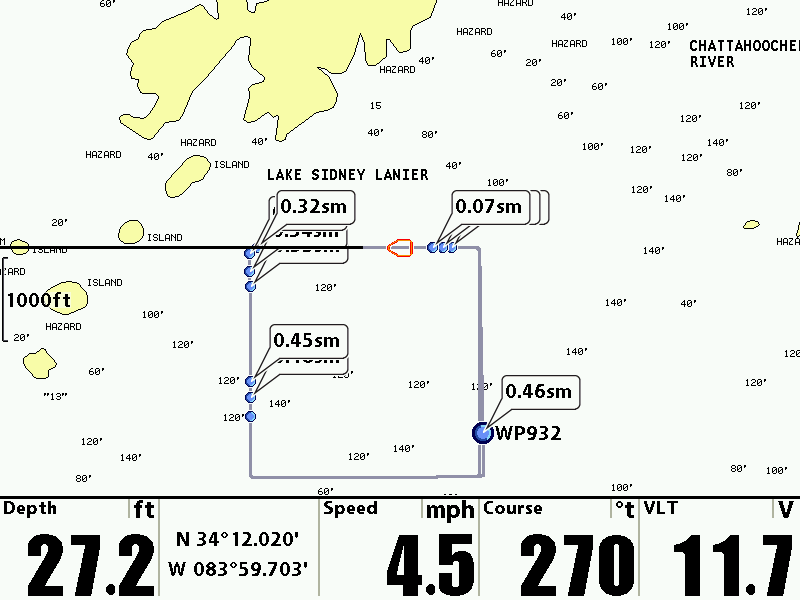
- TTG Readouts on all Units - added to some models that did not previously have this available in the Nav Readouts sections
- Lower Range Expansion - Lower Range can now be set to auto or manual. In manual mode, it can now be set to as little as two feet.
- Hide Track - you can now make a specific track visible or hidden through the Waypoint Management Menus
- Scaled Boat Icon - The Boat icon size now changes depending on the chart scale the unit is set at. There are three sizes: Small, Medium and Large(current icon)
- Display Assigned Waypoint Icon in Readout Boxes - blue dot icon is no longer used. Actual assigned icons now show. (only on chart plotter, not track plotter units)
- Disable Nav Data Auto Upload for SD Cards - Navagation Data stored on an SD card will no longer update automatically. You will now be prompted as to whether you would like to update the Nav Data.
- Track Memory Warning - notifies the customer when they are within 10 minutes of filling up their track memory and starts overwriting data
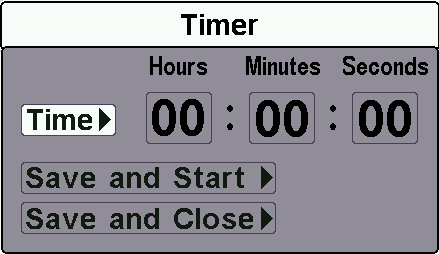
- Timer - allows you to open a dialog box to setup and start a time. The countdown can be view via a selectable readout as well as in the setup box. When the timer is started the clock counts down from the amount of time set in the dialog box. This feature is part of the Alarms Menu Tab.
- Vessel Offset - allows you to display more of the Chart View based on the speed of the boat. Vessel Offset works with Offset Speed.
- AIS functionality - added to 700 HD series products.
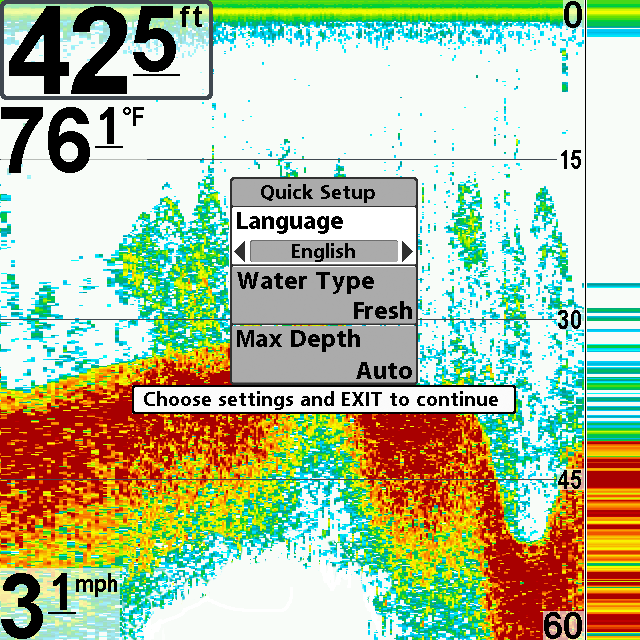
- Quick Setup - allows immediate set up of Water Type and Max Depth if the unit has never been turned on before or the defaults have been reset
- Sea Bed Off - default has been set to off (on chart plotter products only, not track plotters)
- No Auto sensitivity on Imaging - auto sensitivity is no longer active on any Down Imaging or Side Imaging products. This change was made because these type products function best with custom settings.
- North Up Indicator - An arrow displays ont screen showing which way is North even when the chart is oriented to heading or course up. this is located in the Chart Menu Tab, it can be set to On or Off. The Default setting is Off.
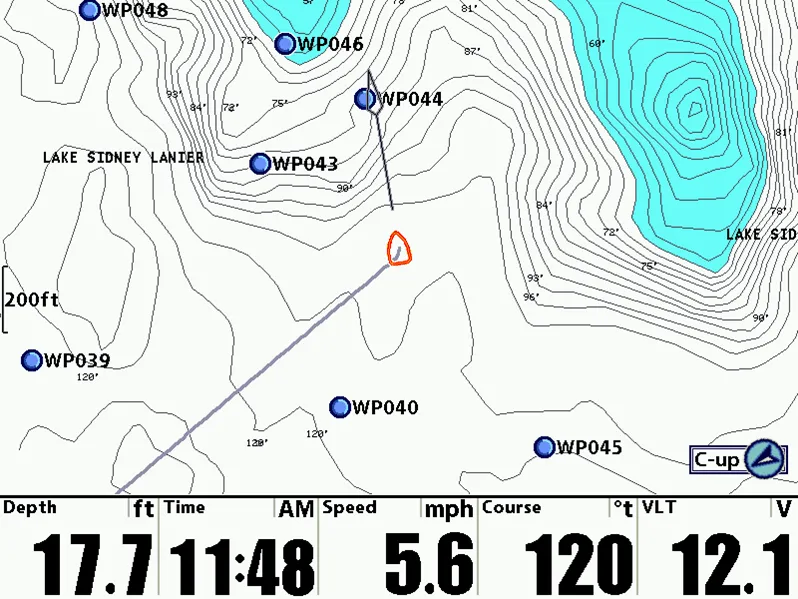
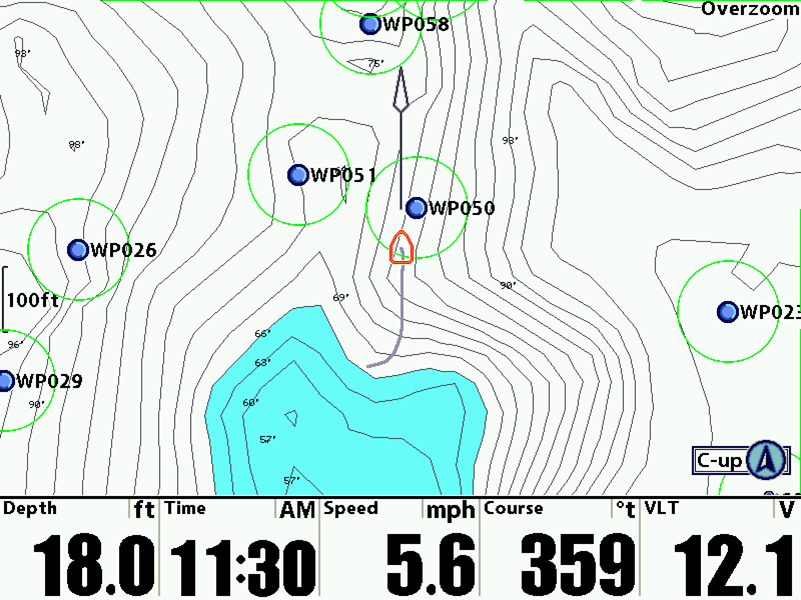
- Casting Rings - Allows you to display a circle around each waypoint on the Chart View based on the zoom level set. This menu option sets the distance that the Casting Ring will be displayed from the waypoint. Settings are Off to 150 ft; Default is Off.
- Auto Zoom on Chart - sets the Chart view to zoom automatically based on the speed of the boat. Setting are: On or Off. Default is Off
- Auto Range on Chart - when turned on, sets the chart scale to the lowest range so that only the boat icon and the next waypoint in the route are displayed. This feature only activates when navigation is underway.
- Skip Next Waypoint Improvements
- Reset XTE - is only available during navigation. When selected, the cross track error will be recalculated from the boat's current position to the next waypoint in the route.
Before XTE has been reset: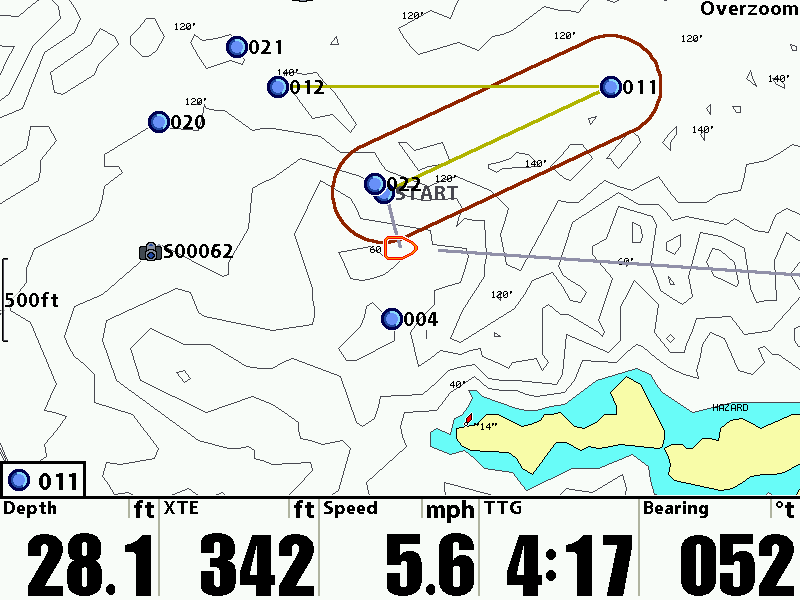
After XTE has been reset: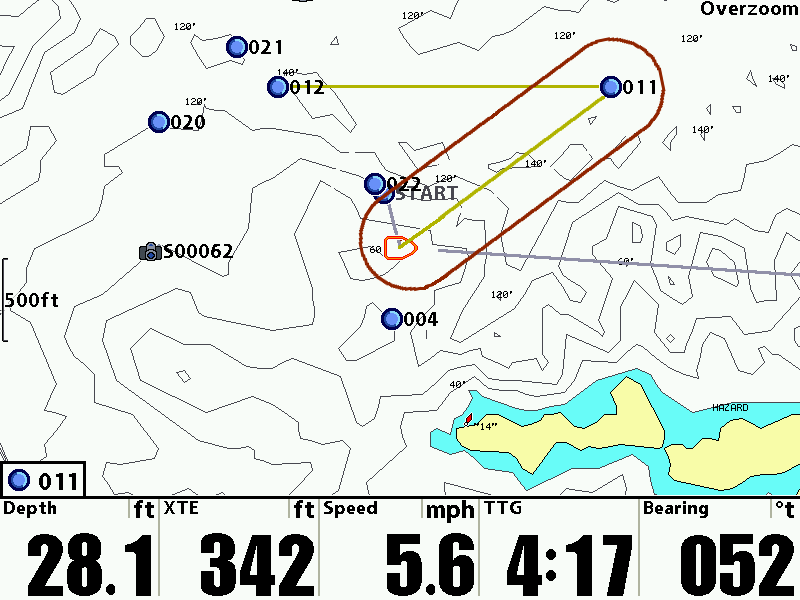
- Chart Orientation - allows you to select whether the Chart and Combo Views should be drawn North-Up, Heading-Up or Course-Up. Default = North-Up
North-Up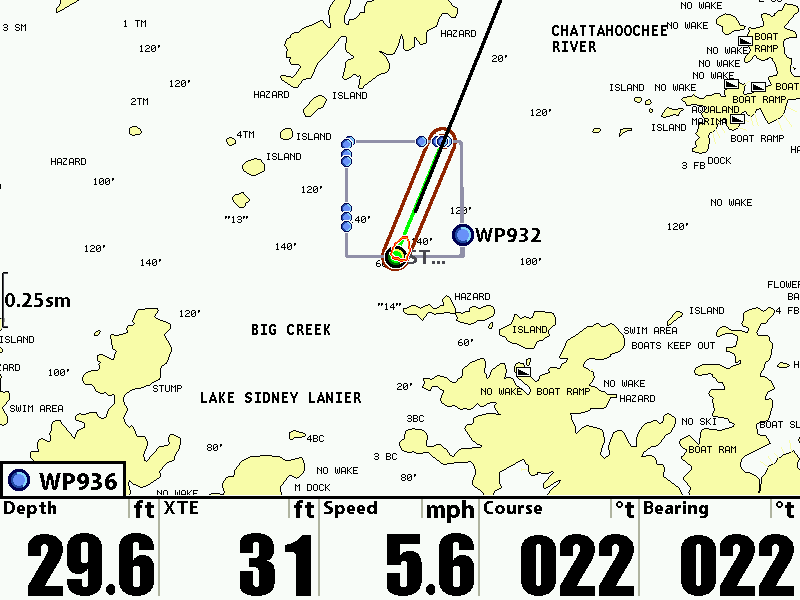
Heads Up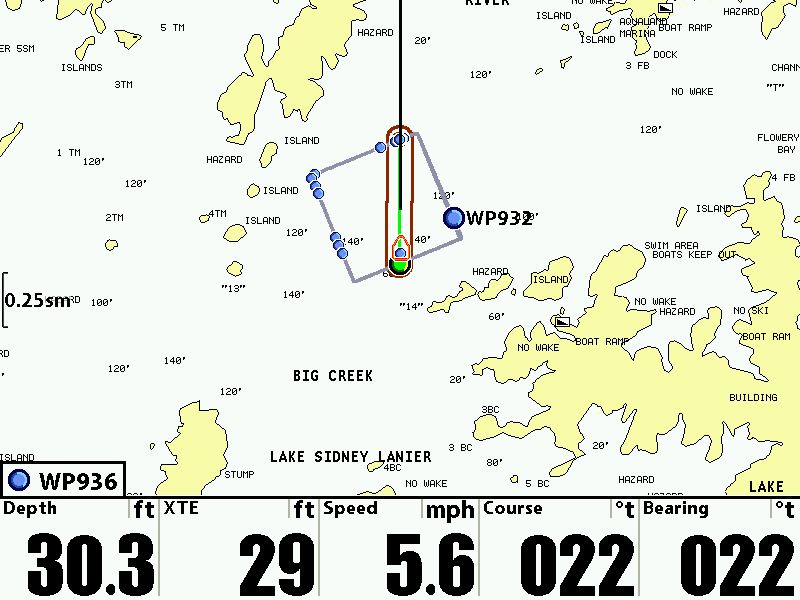
Course Up
- Chart Declutter - removes all chart layers except for land outlines, waypoints, routes and tracks. The chart will stay decluttered for 10 seconds and then it will refresh to previous view.
- Route Drawing Improvements
- Stop Tracking - under Current Track, you have the option to Stop Tracking which clears the current track and the unit will not save trackpoints.
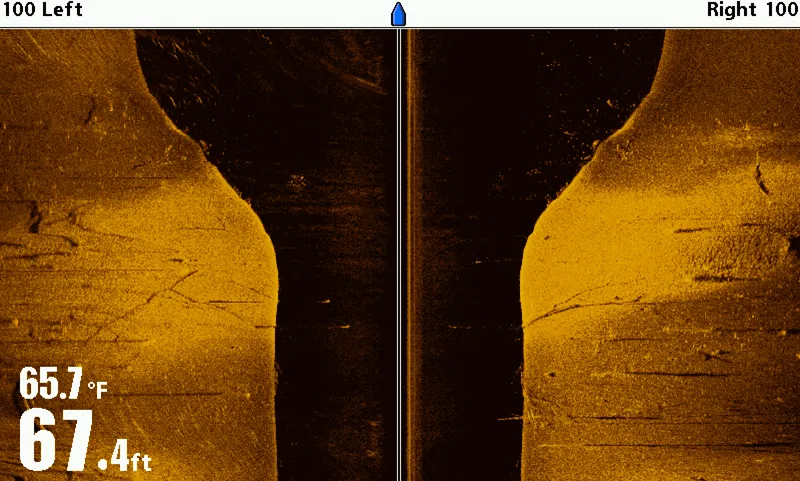
- Removable readouts on SI views - this is only on the 898 and 998 Side Imaging units. This allows for an expanded view of the SI screen. It only effects the full Side Imaging Screen.
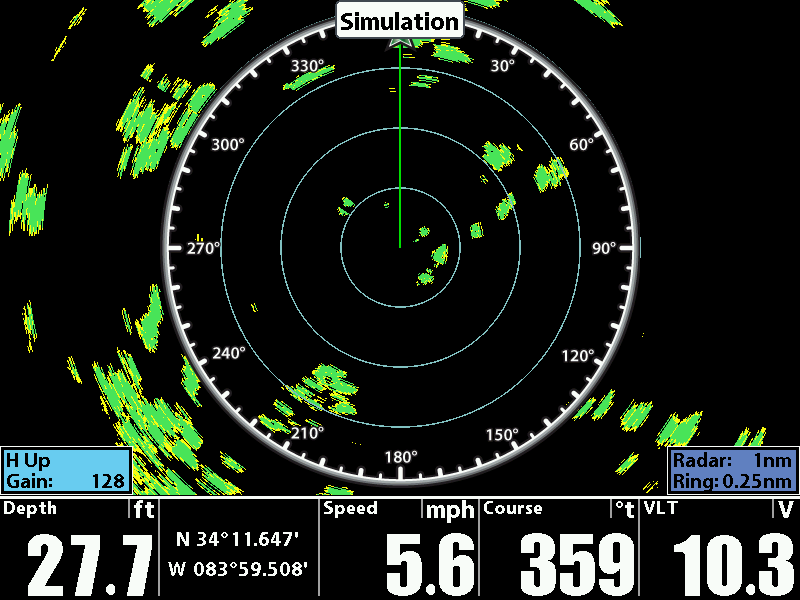
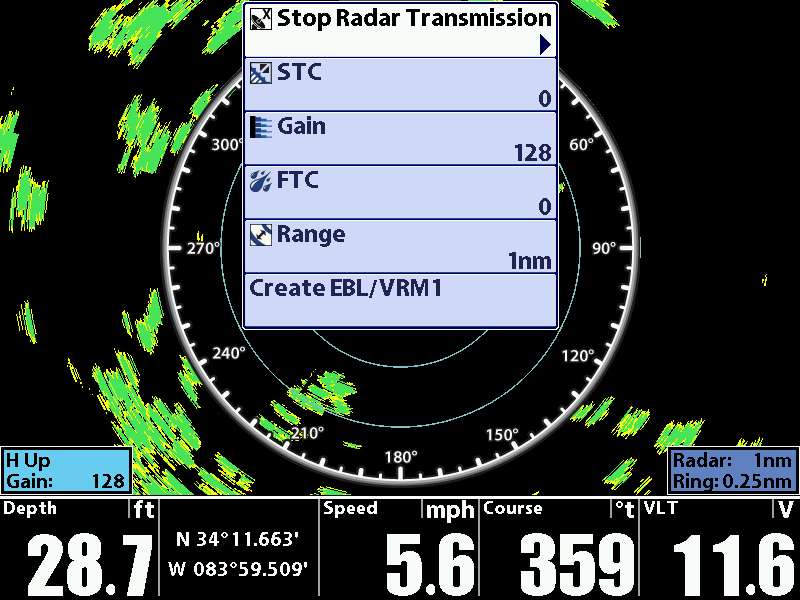
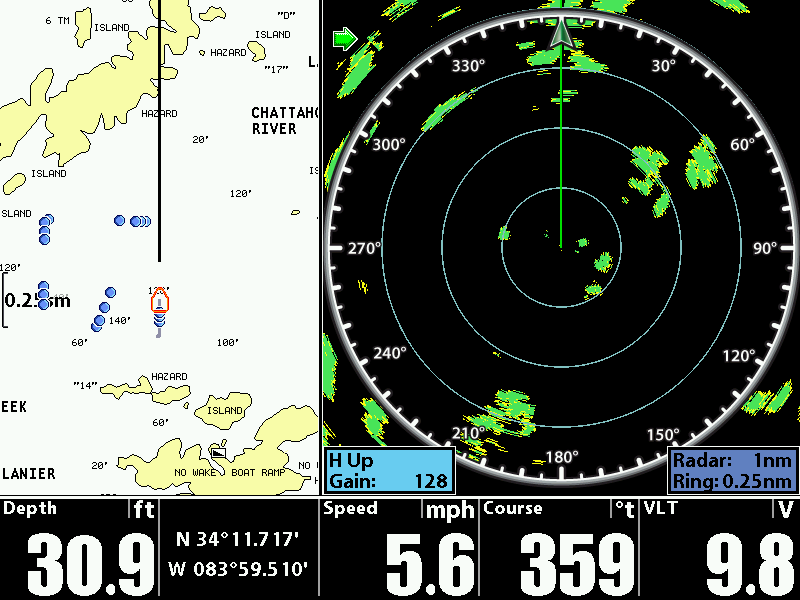
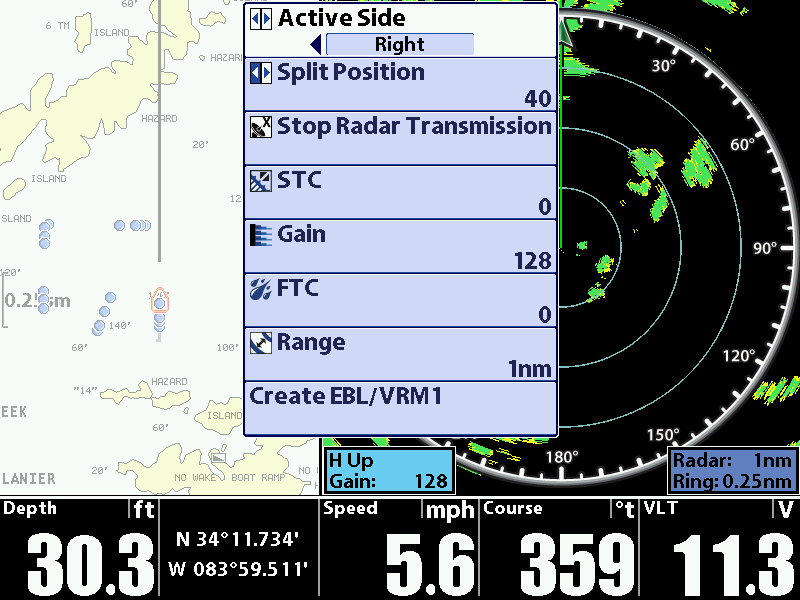
- Radar Support - Allows the addition of Radar to select products. Only available on 858, 858DI, 898, 958, 958DI, 998, 1158, 1158DI and 1198. Requires an additional purchase.
Software Prerequisites
Minimum Computer Specifications:
- Windows 95 or higher
- 32 MB Ram or higher
- Minimum of 20 MB Free Disk Space
- Pentium or Celeron processor
- An available USB Port
- Humminbird AS PC3
- Monitor capable of running 800x600 or higher
- You must have previously installed HumminbirdPC to your laptop or PC.
Instructions
CAUTION! We highly recommend that you restore the defaults on your Humminbird unit prior to downloading any new software as it can create complications that can only be fixed at the factory.
Downloading the Software to your PC for Updating the Unit
- Click on the XXX UPDATE in the Download box below the software description.
- The File Download box will pop up - Click SAVE and indicate where to save the software update file so that you can retrieve it momentarily.
- A Download Complete dialog box will appear - click CLOSE
Connection to your PC
- Plug the USB cable to an available USB port
- Plug the Accessory connector into the unit
- Attach the power cable to the new 8 AA batteries on the AS PC3 (DO NOT PLUG THE POWER CABLE INTO THE UNIT AT THIS POINT)
Using Humminbird PC
- Be sure your unit is connected to the computer, but do not power on the unit at this point
- On your computer's task bar go to START>>-PROGRAMS>>HUMMINBIRDPC. This will start the HumminbirdPC program. After Humminbird PC loads power on your Humminbird unit.
- On the Humminbird PC program you will then see an icon of your Humminbird unit. Click on this icon.
- You will then see an icon that is a yellow oval with a blue circular arrow , click on the yellow oval icon. HumminbirdPC will then start the Humminbird Software Update Wizard.
- You will then click on Next to proceed. Your unit name and serial number will then appear on the screen.
- You will then click on Browse and then click on the update file (.bin file) that you have saved to your PC and click Open. This will prepare the file to be transferred into you unit.
- Then click next to proceed with the software update, the update will then start. DO NOT POWER OFF THE UNIT DURING THE UPDATE.
- Once the software update is complete the unit will reboot itself.


