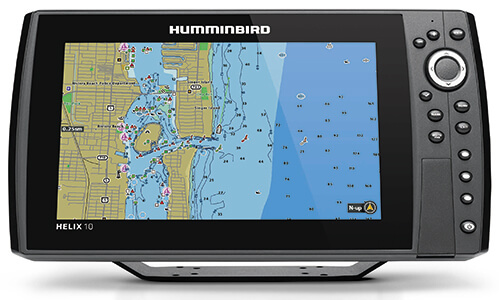
Software Update - HELIX 7 CHIRP DI GPS G2N v. 2.320
DO YOU PLAN TO USE BASEMAP ON THIS HELIX?
In order to use Humminbird Basemap with the latest software version of software for your HELIX, 2.320, you will also need to install a new version of the Humminbird Basemap (a separate update) IMMEDIATELY following this update. If you update your HELIX to software version 2.320 but do not install the updated Humminbird Basemap, you will not be able to view the Humminbird Basemap. If you perform the update to 2.320 update in error, there is no way to recover to a previous version.
This is a two-step process. A link to the instructions to download the Updated Humminbird Basemap will be provided in the instructions to update to HELIX Software 2.320 at the bottom of this page.
I understand. Continue to the update. >>
Released 08-12-2020
Software Description
Please Note:
- The defaults will be restored when 2.320 is installed.
- Once 2.320 is installed, you cannot downgrade to a version older than 2.320.
New Features:
Support for new HELIX Basemap Update (All HELIX GPS Models):
- All HELIX units with built-in Humminird basemaps will have their compatible basemap support updated by software update 2.280 and newer
- As a result, all users must download and install a new basemap onto their HELIX unit
- HELIX 5, 7, and 8 models will need to download updated HUMMINBIRD BASEMAP VERSION 2.010
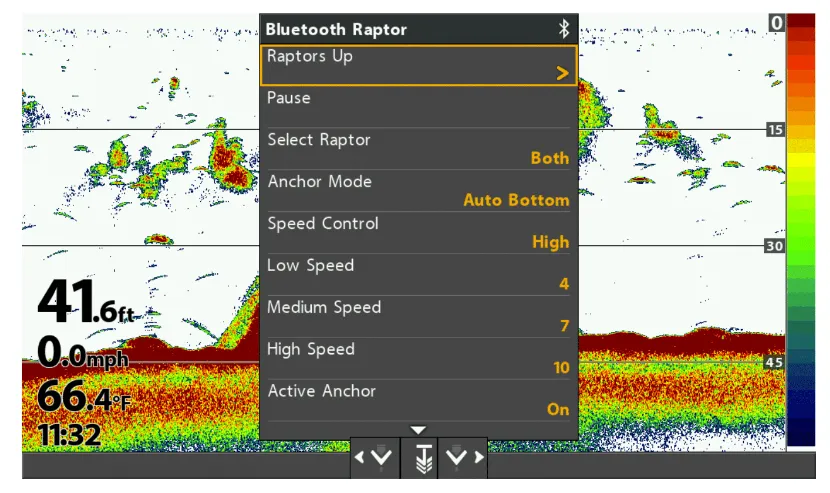
Support for new Minn Kota Raptor Shallow Water Anchor (HELIX G2N and G3N Models):
- Fully control Raptor single or dual anchor installations:
- Deploy/Retract Raptor independently or as a dual system
- Monitor Deploy State
- Adjust Anchor Mode (Soft Bottom, Normal, Rough Water, and Auto-Bottom)
- Enable or Disable Active Anchoring
- View and control Bluetooth Device Lists
- Share Raptor across the Humminbird Ethernet network to other HELIX units
- Update Raptors using HELIX units

Support for Cannon Optimum (HELIX G2N and HELIX G3N Models):
- Fully control up to four Cannon Optimum or Optimum TS downriggers:
- Control features like Line Up, Line Down, Cycle Mode, and Bottom Tracking options
- Display downrigger and Fish Hawk™ information in data boxes and overlays
- Adjust all downriggers settings including but not limited to Line Type, Line Up/Down Speed, and PIC Voltage values
- View and control Bluetooth Devices Lists
- Share Cannon Optimum downriggers across the Humminbird Ethernet network to other HELIX units

General Fixes:
SYSTEM
- New for 2.320 vs. 2.280: Fixed an issue causing upgrade issues from version 1.400.
SONAR
- New for 2.320 vs. 2.280: Fixed an issue with digital depth readouts on overlays and databoxes.
- Fixed an issue where HELIX units would continue pinging while in Standby Mode.
- Fixed an issue where 50kHz sonar data was weaker than expected while set to Switchfire Clear Mode.
RADAR
- Fixed an issue where RADAR Heading Offset was not working correctly.
General Fixes:
SONAR
- Fixed an issue where HELIX units would continue pinging while in Standby Mode.
- Fixed an issue where 50kHz sonar data was weaker than expected while set to Switchfire Clear Mode.
RADAR
- Fixed an issue where RADAR Heading Offset was not working correctly.
Software Prerequisites
You will need:
- a working Micro SD reader/writer device attached to your PC and
- formatted 32GB or smaller Class 10 or MMC/SD card
Instructions
Please read carefully before proceeding.
We highly recommend that you RESTORE the defaults on your unit BEFORE you perform any software update. We also suggest that you disconnect any advanced accessories from the unit (i.e. Weathersense, Interlink, Cannonlink, etc) before proceeding. The exceptions to this would be if you have the MinnKota iPilot Link or the Humminbird 360 Imaging attached. Both of these items need to be connected to the unit in order to update their software which is done via Ethernet.
How to Restore Defaults:
With the unit powered on, Press the MENU button twice to the main menu on the system. Then you press the RIGHT cursor until you get to the SETUP menu tab. Once you have reached the SETUP menu tab, use the DOWN cursor until you reach RESTORE DEFAULTS, you will then press the RIGHT cursor key to restore the defaults. To confirm press RIGHT cursor again.
To update with a Micro Card with SD Adapter
- After thoroughly reading these instructions, you can return to the Download dialogue box and click on Download. The software files are in a .bin format. You will not be able to open these files, they should only be saved.
- You will need to select to save this file to the Micro Card. (The Micro card may be listed as a removable disk, removable storage drive, MICRO). Do not modify the name of the file, then click on SAVE.
- After the Download Complete dialog box appears - click CLOSE
- Remove the MICRO Card from the card reader. After removing the MICRO card from the reader and before powering on the unit, we recommend that you disconnect any Advanced Accessories connected to the unit. This might include a GPS receiver, Interlink, Cannonlink, etc.
- POWER ON YOUR UNIT, allow the unit to go through the complete start up BEFORE pressing any buttons or selecting any menu options. After the unit has completed the loading process and you have clicked through the warnings and information, place the MICRO card in the unit.
- You will get a message on the unit saying SOFTWARE NUMBER “123” is higher than your current “120” software do you want to update?, Press the Right Cursor to Confirm.
- Another message will then appear saying do you want to ABORT, press the Left Cursor to NO at this time and the software update will begin. DO NOT POWER OFF THE UNIT DURING THIS TIME. If you lose power to the unit during the software upgrade process, it is very likely that the unit will need to be returned to the factory for updating.
Once the update is complete the unit will restart and say current SOFTWARE NUMBER “123” installed, no update required. It is now safe to remove the MICRO Card, and power off the unit. - Once you have updated the software on the unit, we suggest that you add back your advanced accessories. If you have an Interlink, we suggest that you first connect to unit 1, power on the unit and allow it to update the software on your Interlink. After this you may reconnect the remaining advanced accessories.
Here is a short video on this subject
Download Software
STEP 1: DOWNLOAD HELIX SOFTWARE UPDATE 2.320
STEP 2: DOWNLOAD BASEMAP SOFTWARE UPDATE
