Side and Down Imaging Tips for Dirty Water

There are a few situations and times of the year where your Side Imaging® and Down Imaging® may look a little cloudier or less clear than normal. We're going to explain those situations and a few solutions to getting your sonar to look as crisp as possible.
First, we should preface this by pointing out that we're not speaking about clean vs dirty water in the sense that most of us assume. Water clarity has no effect on Side and Down Imaging because sonar is not affected by the color of the water.
When we mention "dirty water" in this article, we are referring to sediment or particles in the water that can affect your side and down imaging quality.
Side and Down Imaging Detail
Humminbird® users are familiar with the high-level clarity and detail that they get out of their fish finders, especially those that have a MEGA Imaging® fish finder.
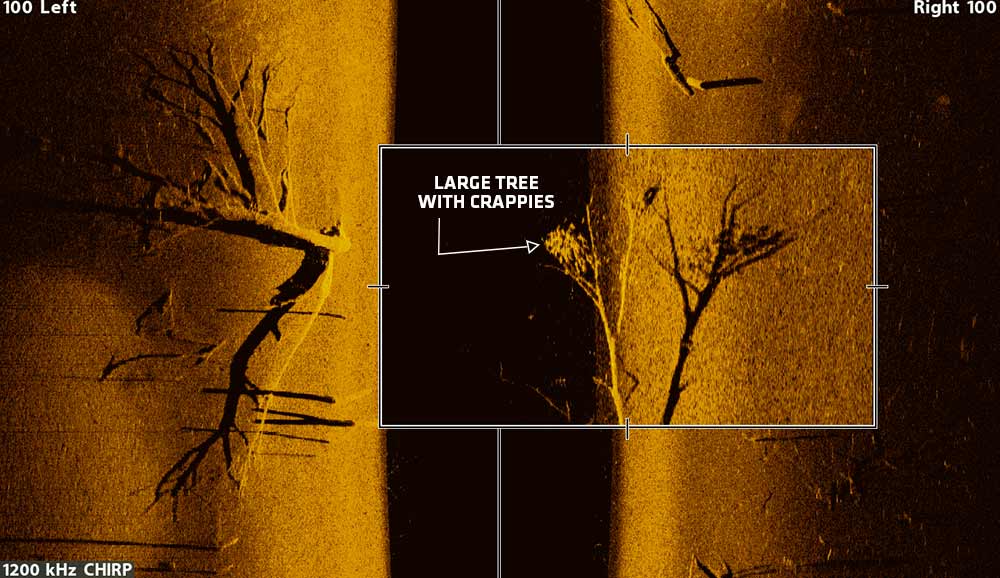
MEGA Imaging® operates on the megahertz frequency range, which means it provides the highest level of detail and clarity compared to any other imaging sonar out there.
This level of detail means that it can pick up the smallest particles and objects in the water. When the water is dirty or filled with particles, the imaging returns will pick these tiny objects up and display them on your screen (tips for fixing this are below).
Dirty Water Sonar Situations
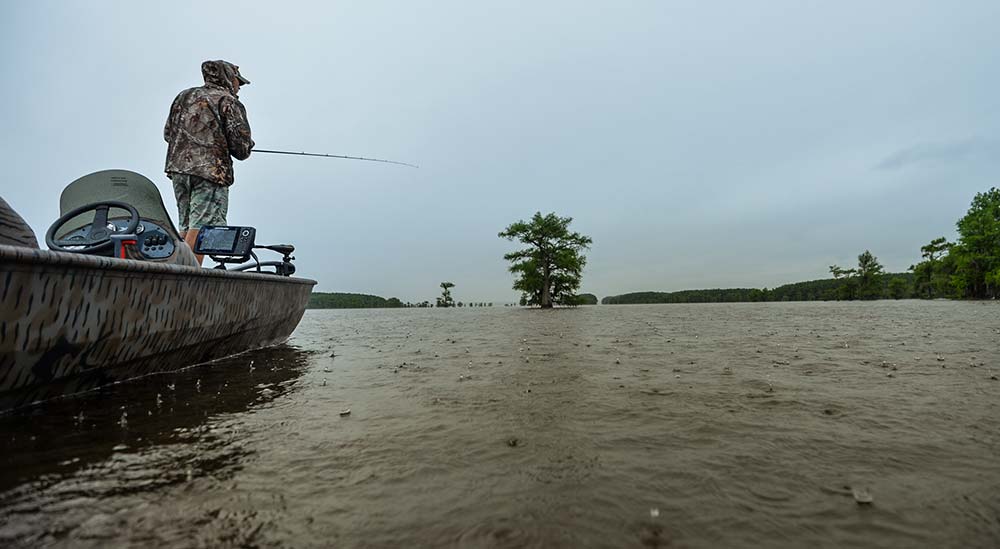
High Water Brings Sediment – A dirty water situation that commonly happens in spring is when heavy rain or melting snow/ice brings induces high water levels, increased current, and ultimately more sediment and particles in the water.
These particles and sediment can "cloud up" your side and down imaging picture.
River and Current – For those who fish a lot of rivers or reservoirs with current, you tend to see dirtier water in certain areas because of the sediment that is washed away from the riverbank or bottom.
Pollen and Algae Blooms – In spring and early summer, many of us experience seasonal allergies from tree and other pollen that is spread through the air and eventually onto our waterways.
This pollen accumulates in the water and can show up on your side and down imaging. The intensity of this pollen accumulation depends on the area of the country that you fish and time of year.
Algae blooms are a frustrating aspect of fishing during certain times of the year, and this phenomenon will also affect your sonar returns.
Tips for Cleaner Side and Down Imaging Returns in Dirty Water
Use Water Column Sensitivity Setting to Reduce the Clutter
For Humminbird fish finder users, there is a feature that can help you clean up your view called Water Column Sensitivity.
This feature allows you to increase or decrease the sensitivity of the sonar return that is in the water column to ultimately get more or less detail.
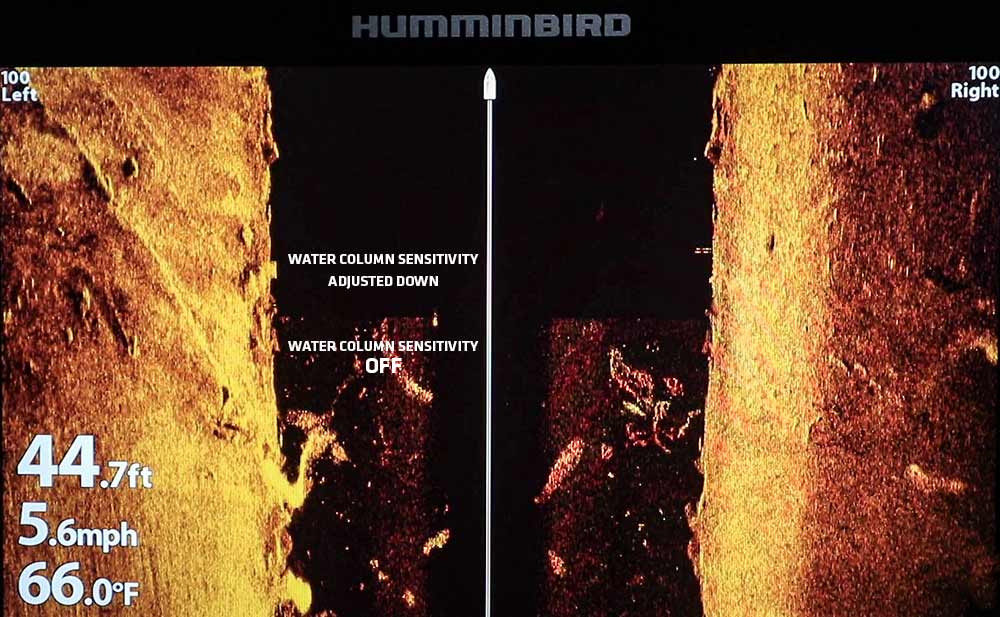
As we mentioned in the beginning, MEGA Imaging provides the highest detail available, which will pick up the smallest of objects or particles.
When high levels of sediment or particles are in the water, adjust your Water Column Sensitivity down a few notches to remove clutter from your side or down imaging view.
How to Turn on Water Column Sensitivity on your Humminbird
HELIX® Models
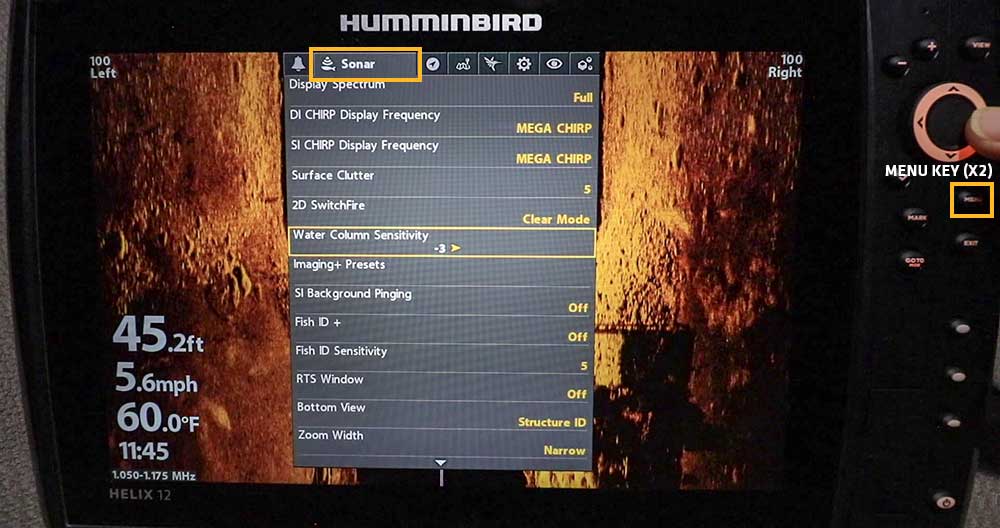
-
Press Menu twice
-
Navigate to "Sonar" Menu Tab
-
Scroll down to "Water Column Sensitivity" and adjust to a negative number to clear up clutter
SOLIX® and APEX™ Models
-
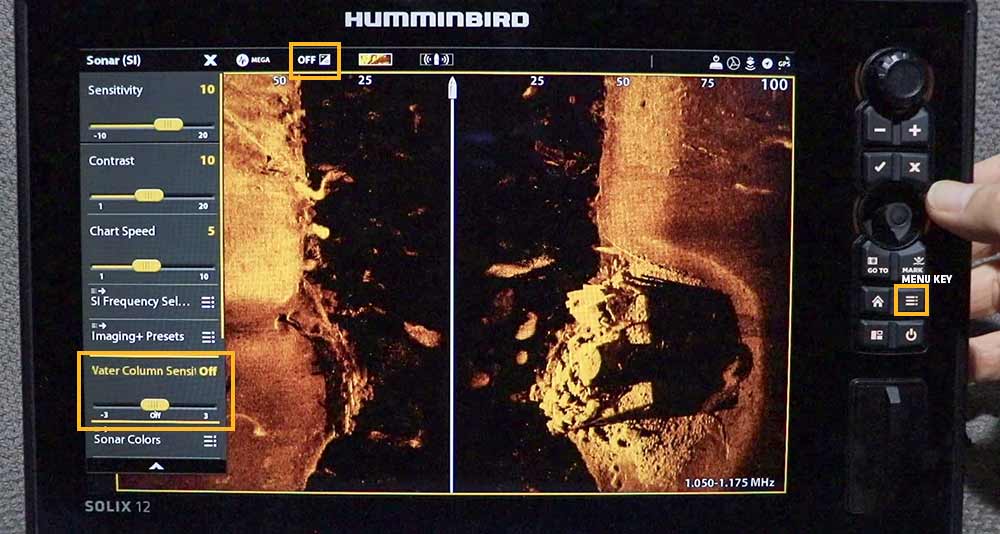
Press Menu soft-key on right side of unit (while on a down/side imaging view)
-
Scroll down to "Water Column Sensitivity" and adjust to a negative number to clear up clutter
-
Alternate Option: Use the touchscreen to tap the "Off +/-" icon in the top menu bar to pull up the Water Column Sensitivity x-press menu
Use Dynamic Contrast to Improve Detail and Reduce Water Column Clutter
Similar to Water Column Sensitivity, Dynamic contrast also gives you the ability to quickly clear up and optimize your view of side and down imaging by applying an automatic contrast adjustment, but it affects more than just the water column.
If you're noticing that the sonar returns outside of the water column (black area on left/right of middle line) are also hazy or cluttered, try using Dynamic Contrast first.
How to Turn on Dynamic Contrast on Your Humminbird
HELIX Models
-
Press Menu twice (while on a side/down imaging view)
-
Navigate to "Sonar" Menu Tab
-
Scroll down to "Dynamic Contrast" to turn on/off
-
X-Press Menu Shortcut: While on a side/down imaging view, press 'Menu' once and scroll down to Dynamic Contrast and turn on/off
SOLIX and APEX Models
-
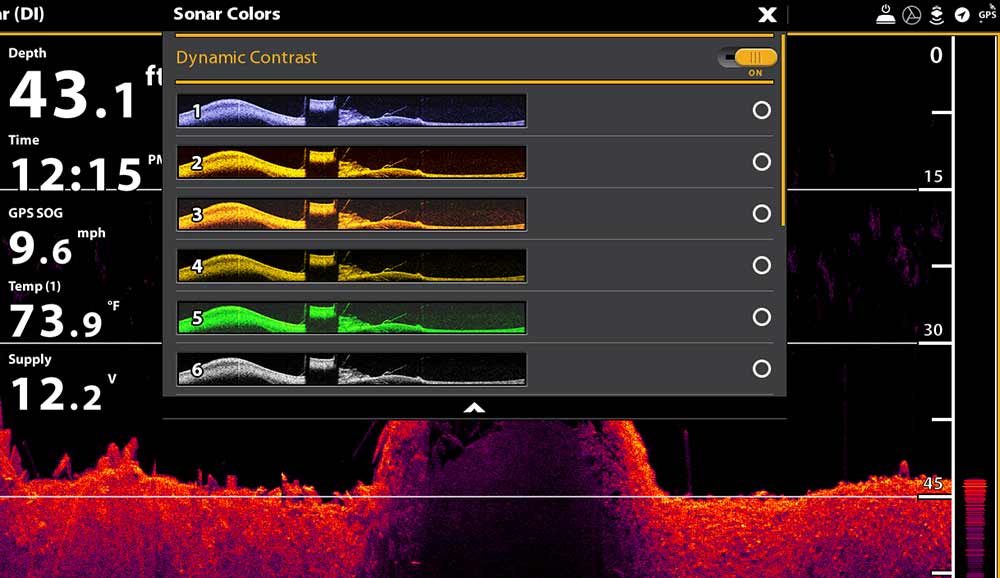
Use the touchscreen to tap the "Color Palette" icon in the top menu bar to show the Dynamic Contrast on/off option (above color palettes)
Change Side/Down Imaging Frequency to Clear Up Clutter
Another solution would be to change your frequency from MEGA Imaging to the original 455kHz frequency.
455kHz is a lower frequency that provides less detail, meaning it will not pick up the tiny particles as much. This will also mean you will have less detail of the cover/structure that you are trying to locate.
Although a viable option, we suggest giving the first to options a try first, as they will not sacrifice the detail found on the MEGA Imaging (1.2mHz) frequency.
Next time you're on the water and experience cloudy or cluttered sonar returns on Side and Down Imaging, give these options a try for a clearer view of fish and structure.
Interested in more educational resources like this? Make sure you subscribe to the Humminbird newsletter for updates on the latest products, technologies, and educational resources.

Resources


